Quick Tip: Global Footer in Keynote
Do you give a lots of presentations? Or maybe you have that one presentation template that’s your staple. In any situation when working on a new deck, there may be lots of tedious edits to be made. Of those edits, one of the most annoying that I’ve always hated is needing to update the footer information. Going from slide after slide and copy/pasting the new information into place not only is time consuming, but also incredibly boring. But with the use of tables inside your slide deck, cutting down this process is a breeze!
TL;DR
Update text with tables in Keynote!
Enter the table

Ew, tables! I know that might be your first thought, but honestly hear me out. Within Keynote, any table can be referenced within another table cell on any slide. With this information, setting up this pseudo-CMS is a breeze.
1. Create the Master Slide
To start, open the Master Slides in your presentation using one of the following methods:
- Click on View > Edit Master Slides in the menu bar at the top.
- Click on Edit Master Slide in the Inspector located on the right-hand side. Note: If you don’t see this, be sure to click off any object in the slide area and the Slide Layout panel will show.
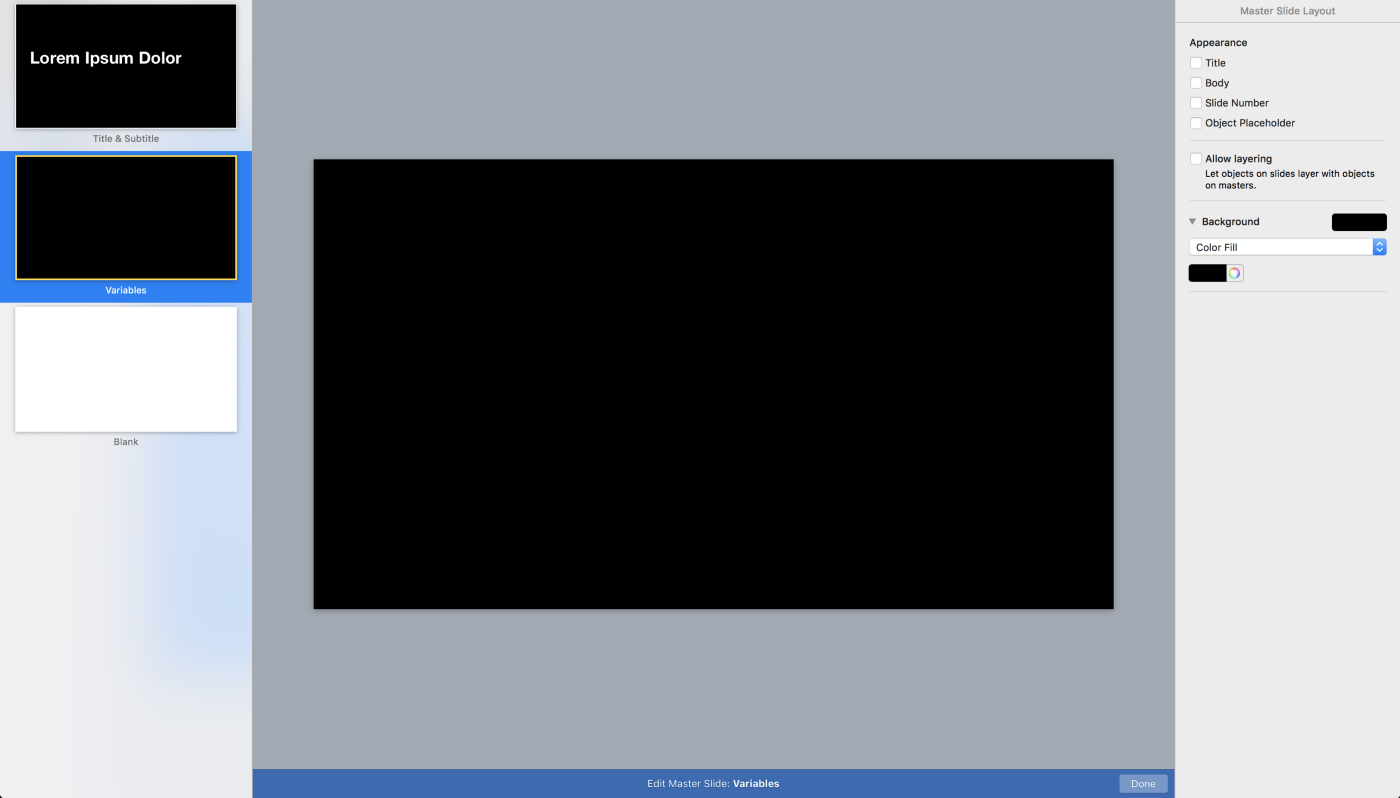
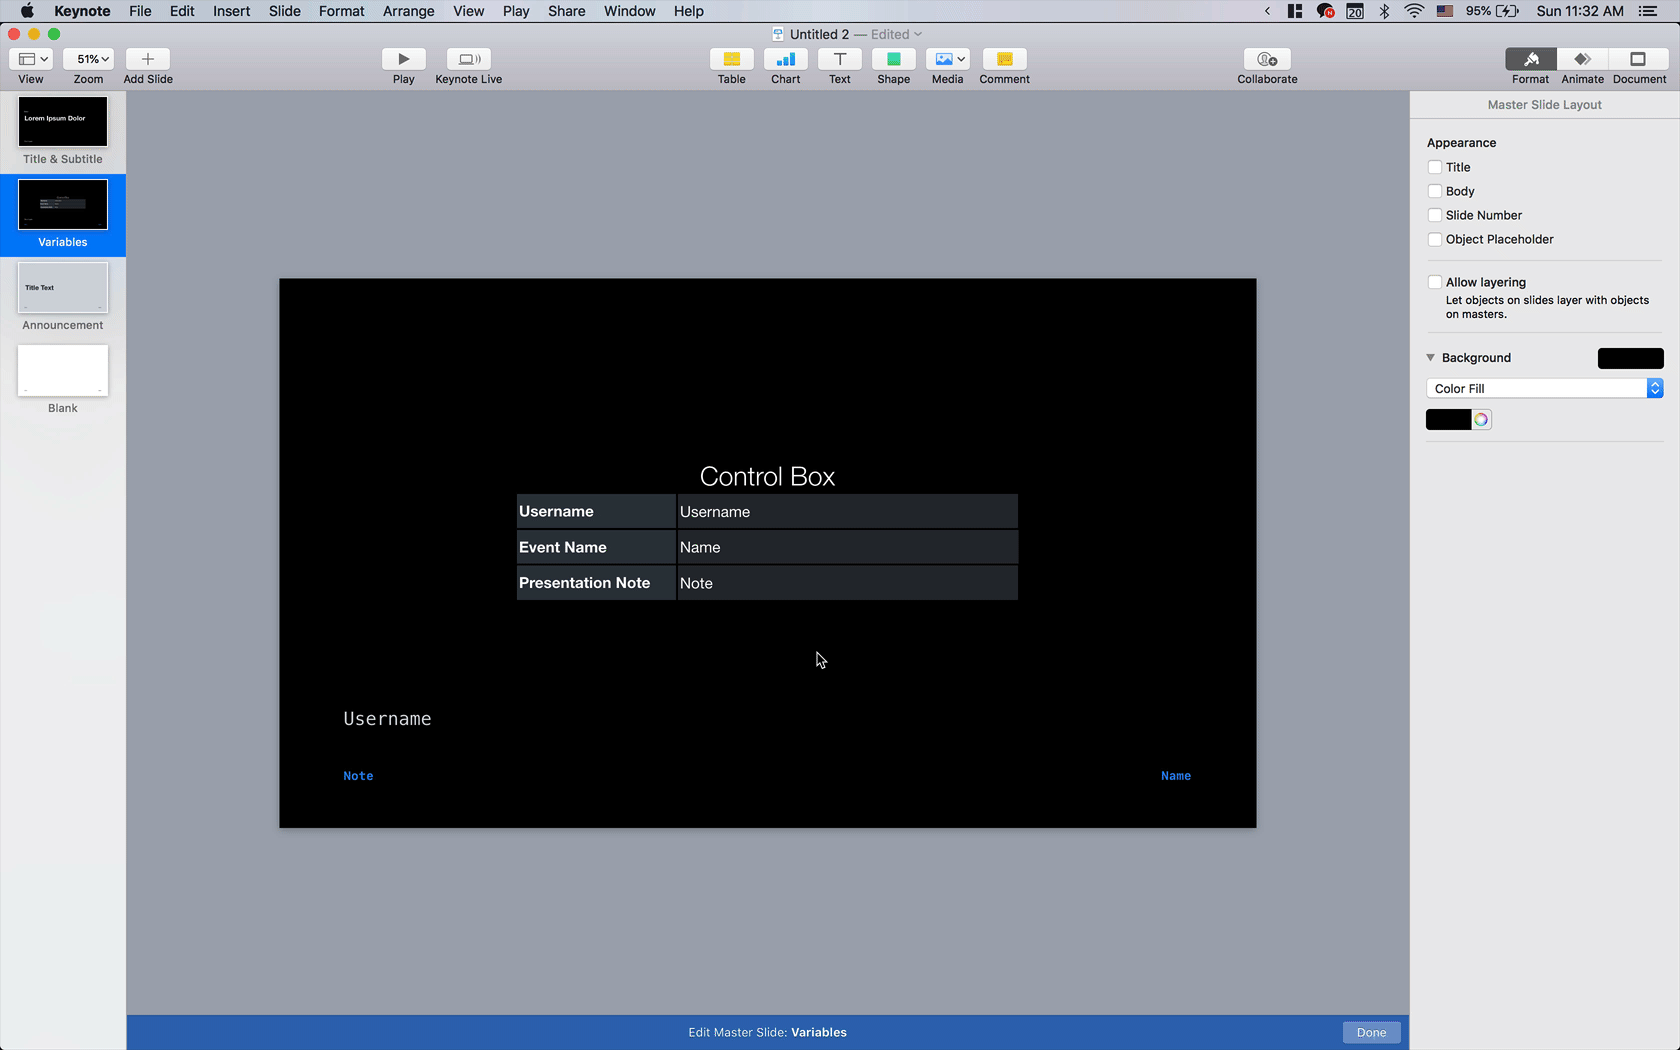
In the Master Slides, add a new slide. You can call this slide whatever you want, in my example I’ve named it “Variables.”
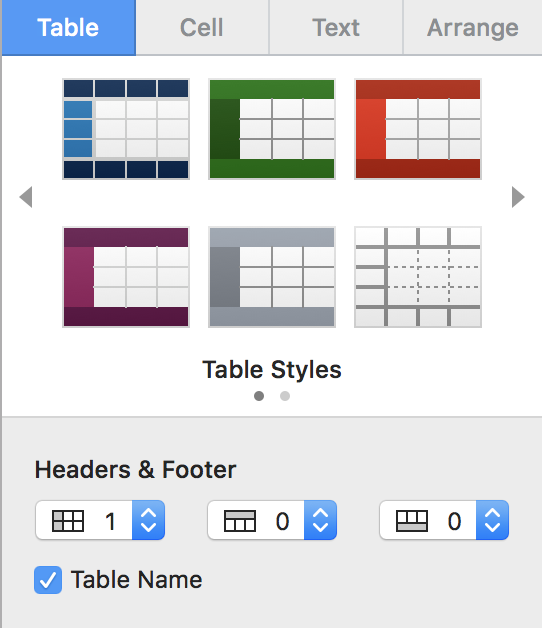
2. Add your table
Add a table by clicking the Table icon in the toolbar or from the menu bar Insert > Table > Plain.
Your table doesn’t have to look special unless you’d prefer to style it. That’s all up to you!

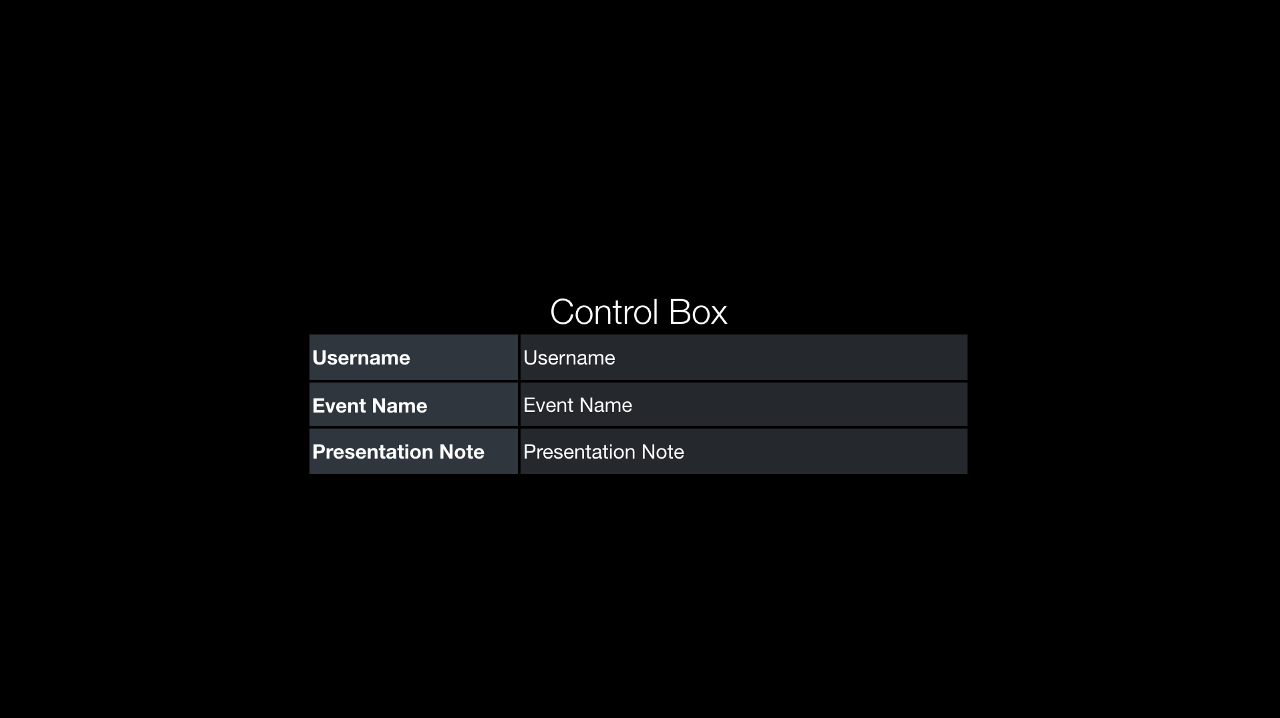
I’ve set my table up on the left to reference the items I’d like to control which in this case are the Username, Event Name, and a Presentation Note.

I also like to add a Table Name for organizational purposes. I’m calling mine Control Box. This isn’t necessary but helps me keep things clear in case I’d like to have multiple tables controlling various types of text.
3. Add the editable areas
Once your variables table is finished, you’ll want to add individual table cells to the slides where you want the consistent information to appear.
On a blank slide, add a 1x1 table and inside the cell type =SLIDE_NAME::TABLE_NAME::CELL and your information will be linked to your main Variables table.
For example, to get the Event Name value, mine would reference the Variables slide, the Control Box table, cell B2 which looks like this:
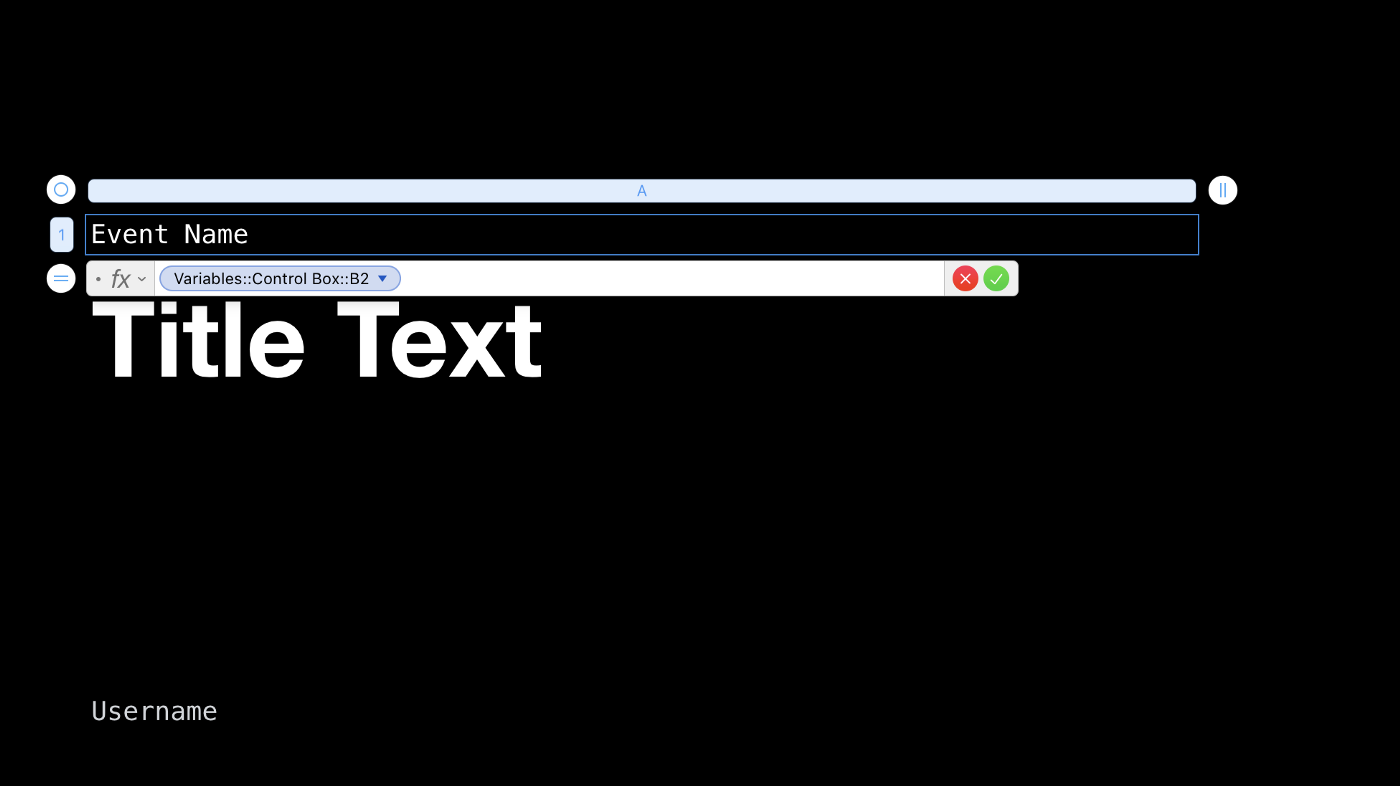
Once I press the ✅ it’s fully linked and populated with the information from my Control Box table.
See it in action!
This little trick honestly saves me so much time when editing slide decks! Also with a little bit of searching around, I found others who discovered this amazing trick as well!
Ash Guillaume is a graphic designer living in San Francisco. Sometimes he posts up a random doodle on Dribbble but mostly he likes to think about puns for everything. He loves to meet and connect with new people so feel free to reach out on Twitter to @_aguillaume.


